Imagine you are not just a photographer, but a lighting assistant, weaving tales and sentiments through the dance of light and darkness. This is the heart of portrait lighting. It’s about shaping ambience, highlighting unique traits, and breathing life into your images. It’s what sets apart a simple photo from an enchanting visual story.
Content Updated October 23
Let’s shed light on the core categories of portrait lighting, guiding photographers to elevate their portrait captures:
UPDATED
Natural: Harness the glow of the sun, leveraging the beauty of natural daylight. It’s typically gentle and complimentary, perfect for open-air shots. Artificial: For moments demanding exact illumination, turn to artificial sources. Whether studio lights, flashbulbs, or steady lights, they grant you the liberty to mould light just as you envision. Ambient: Within interiors or particular settings, ambient light crafts the overall feel of the portrait. Grasping its significance in enhancing your frame is essential. Mixed Lighting: When navigating scenes with varied light origins, mastering the nuanced blend and cohesive merging of these lights is vital for striking portraits.
Natural Light For Portraits
Chasing the Sunlight Immediately post-dawn and pre-dusk are magical times when nature gifts a warm, golden hue. For photographers, these periods are prime for capturing ethereal shots. For instance, try shooting landscapes during these hours for a magical touch.
Tools in Nature Natural settings already offer a lot, but using reflectors can enhance the play of light and shadow. For example, employ reflectors in forest shoots to highlight your subject. On the other hand, diffusers are perfect for beach shoots, ensuring sunlight isn’t too harsh.
In Search of the Perfect Shadow Soft, filtered light is the specialty of shaded spots. Use structures like pavilions, or natural shade from trees or clouds for a subdued feel. Imagine capturing a portrait under a tree canopy, creating a serene atmosphere.
Angles of Light The direction from which light hits your subject can entirely alter the vibe. Try backlighting for a halo effect, side lighting for dramatic contrast, or front lighting for clarity.
Nature’s Artistic Touch Incorporate natural elements such as foliage, window panes, or even fluttering curtains as creative lenses, introducing captivating patterns. Consider a portrait with dappled sunlight through leaves for an enchanting effect.
Portrait Three Point Lighting
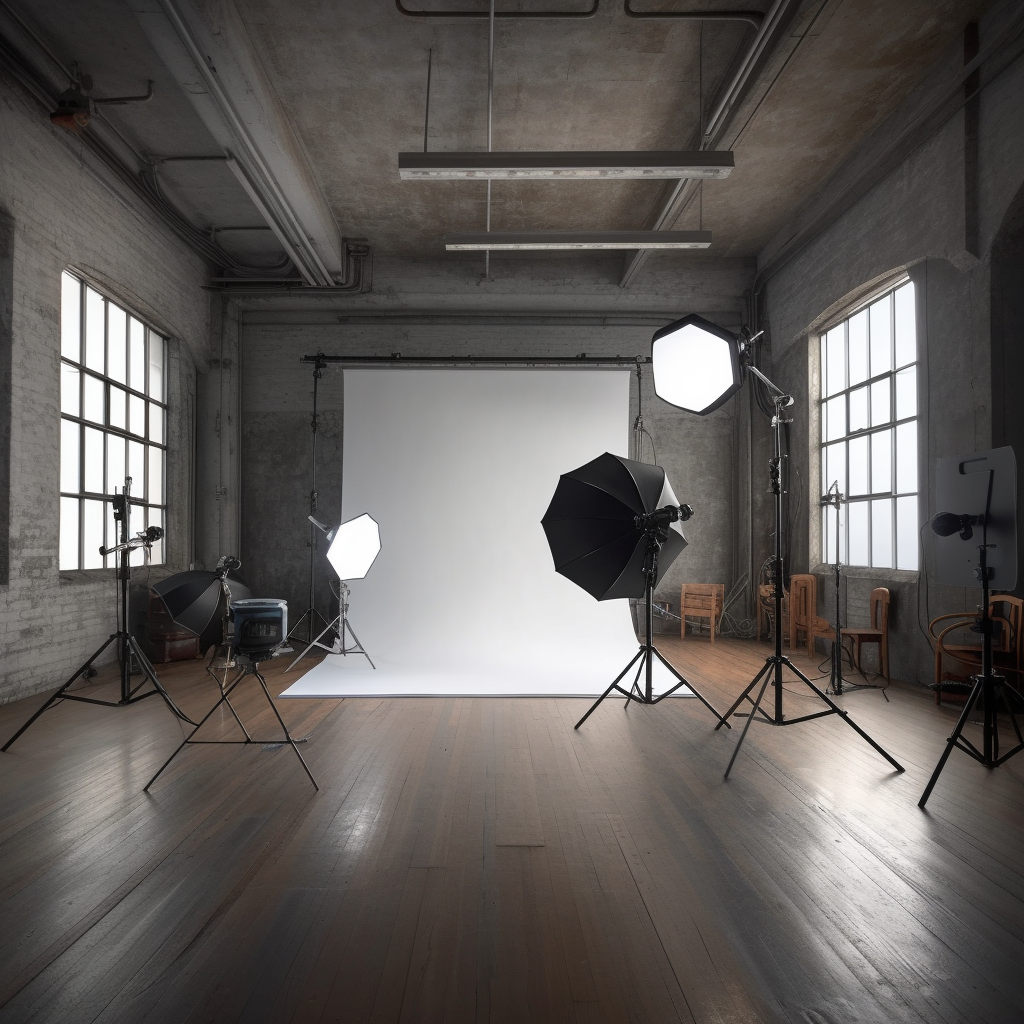
Three-Point Lighting Explained Three-point lighting is a standard technique used in visual media such as photography and filmmaking. It employs three distinct light sources to illuminate the subject from different angles, thus achieving depth, dimensionality, and visual interest. The three lights used are:
- Key Light: This is the primary light source, usually the brightest, positioned at a 45-degree angle from the subject, illuminating one side of their face or object.
- Fill Light: Placed opposite the key light, it’s softer and less intense. Its role is to fill in the shadows created by the key light, ensuring that they aren’t too dark or contrasted.
- Backlight (or Hair Light): Positioned behind the subject, often higher up, its purpose is to provide a glow around the subject’s outlines, separating them from the background and adding depth.
Achieving Three-Point Lighting with Modern Tools With advancements in technology, achieving this classic setup has become more accessible. Here’s how:
- Flash or Speedlights: These can serve as your key light due to their high intensity. Use a flash diffuser or bounce the flash off a white surface to soften its effect.
- LED Lights: These are versatile and can be adjusted for intensity and color temperature. They can act as fill lights, providing consistent illumination. Modern LED panels often come with adjustable brightness settings, allowing for fine-tuning.
- Portable Reflectors: While not a light source, they can act as fill lights by reflecting the key light back onto the subject. This is especially useful when working with a single light source like a flash.
- Backlighting with LEDs or a Second Flash: Use dimmable LEDs or another flash unit, positioned behind the subject, to achieve the backlighting effect.
Today, with the combination of flash and LED lights, photographers can recreate this traditional lighting setup in various environments, be it in a studio or on location.
Marrying Natural and Artificial Light While three-point lighting primarily involves artificial sources, blending it with natural elements can yield stunning results:
- Chasing the Sunlight: Use the setting sun as a backlight or key light, then complement with LEDs or flashes for fill.
- Using Nature’s Reflectors: Water surfaces, sand, or even white walls can reflect sunlight, acting as a natural fill light when paired with artificial key lights.
- Shadow Play: Position your subject in natural shadows and use artificial lights to control illumination, merging the best of both worlds.
With modern equipment and the environment’s natural elements, photographers can craft mesmerizing compositions, bringing subjects to life with depth, contrast, and nuance.
Creative Colour Gels in Portrait Photography
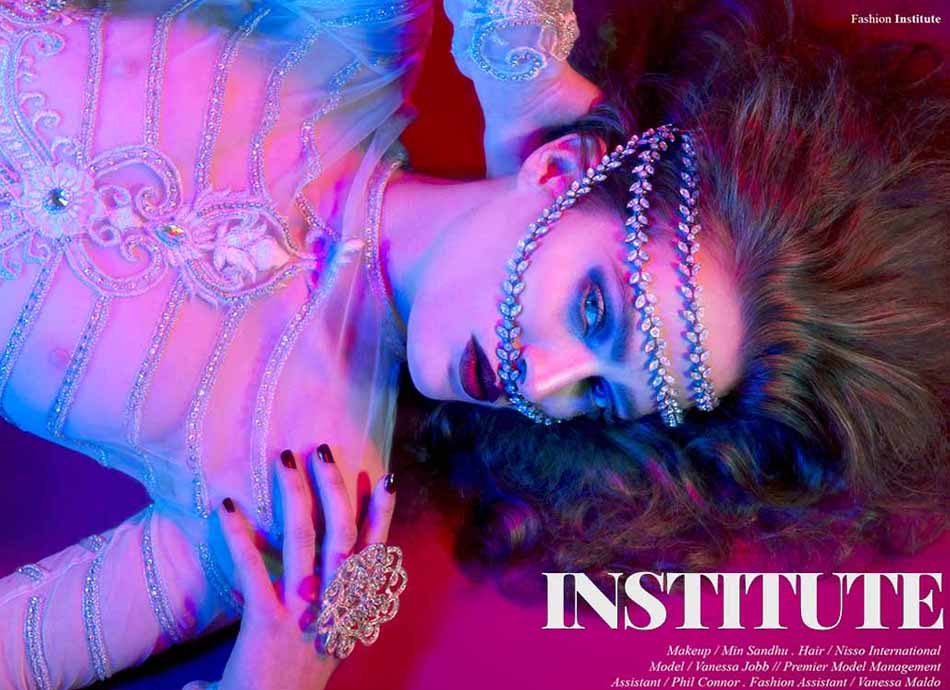
Gel photography, which involves the use of coloured gels placed in front of light sources, can greatly enhance and transform your photos in various ways:
- Mood Creation: Color gels can be used to set a specific mood or atmosphere in a photograph, from mysterious and sultry to energetic and vibrant[3].
- Visual Interest: By adding a splash of colour, gels can make a picture stand out and capture the viewer’s attention.
- Balancing Color Temperature: Gels can be used to balance or modify the color temperature of a light source, making it warmer or cooler based on the desired outcome.
- Highlighting Subjects: Specific colours can be used to emphasize a subject or a particular detail in the frame[1].
- Dramatic Effects: Gels can create strong contrasts and dramatic conditions, such as simulating sunset or twilight.
- Narrative Enhancement: Colors often carry symbolism and can be used to further the narrative or story being told in the image.
In the realm of LED lighting photography, colour gels serve as an invaluable tool to elevate the artistic quotient of your images. These gels can be employed not just to match themes or set a specific mood, but also to introduce striking contrasts or subtle tints, enriching your portraits.
To harness the potential of colour gels in LED lighting photography:
- Securely affix the gel directly onto your LED light source.
- Dive into the world of hues by trying out various colours and layering combinations to craft one-of-a-kind visual effects.
- Integrate the intensity of the coloured gel illumination with ambient or other light sources to achieve a harmoniously lit composition.
- By embracing the spectrum offered by colour gels, your portraits can emanate a spectrum of emotions, allowing you to narrate stories, capture fleeting moments, and craft a signature style that resonates with your artistic essence
Use these light setups to help get a better understanding.
Rembrandt Lighting
Loop Lighting
Split Lighting
Butterfly / Paramount Lighting
Theatrical Lighting
This month I wanted to feature four standard lighting setups that I use on a regular basis. This is lighting which I often use for portraiture and my location fashion photography(as well as one not so typical lighting setup). These setups will add confidence to your photography technique. You can add them to your repertoire, which helps you create unique, dynamic portraits and fashion work.
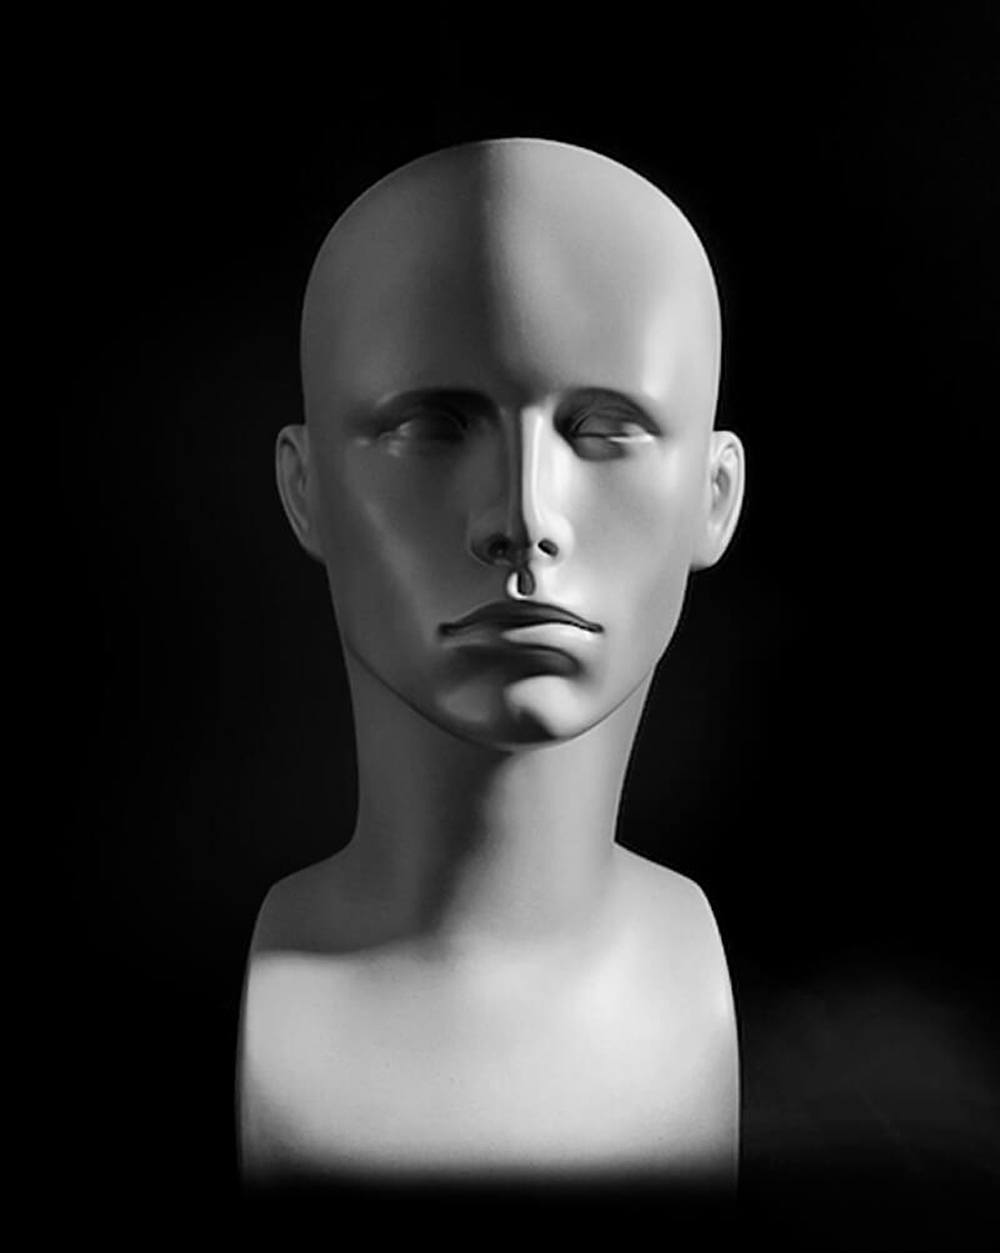
To demonstrate how the lighting works, I managed to find a perfect looking mannequin to help show you the effect of the light. I have sprayed the head matt ivory, which shows the best outcome of light on the subject without being an actual subject.
For the benefits of the light source, I am using an LED light from Amazon to create the studio lighting setups. The cost for them is very cheap but gives a perfect look. It’s also important to point out that light is light wherever, and understanding light is critical. These lighting setups are the same for LED light, Arri or film lighting, or studio flash lighting both in a studio and on location.
These few examples of lighting involve using only one effective light source. Of course, you can add others if you like, and some of my later posts will show how this can work. Nothing stops you from adding more lights or reflectors into the mix to fill in shadows or just be adventurous with your studio lighting. Whether you are using continuous light or flash, hard light or soft light, the light will work the same only at different ratios of power and softness. The shadows will effectively be the same, only harder with direct film light or softer with flash and a softbox.
The below examples were taken with a hard light source which cost me £25 from Amazon to make the light pattern more obvious. It is better as it demonstrates the positioning better and the effect of light on my mannequin. So let us jump in and give you some ideas for your own lighting setups.
James Nader’s Own Style – Rembrandt Lighting
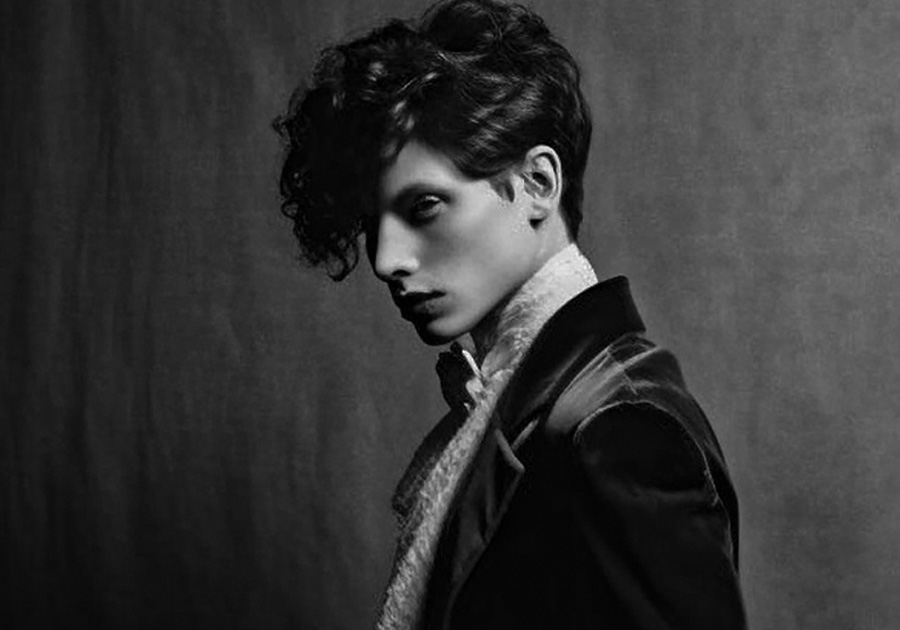
I have adapted the Rembrandt style to work for me and my studio/location work. I place the light slightly higher and not at 45 degrees. The light becomes a little top-heavy and shadowy on the face and only some faces suit this. Men and Androgenous Females. I don’t use it all of the time but I would say that for my theatrical on-location look this works well to increase the overall cinematic effect. You have to be careful with shadows in the eye sockets or deep shadows around the eyes.
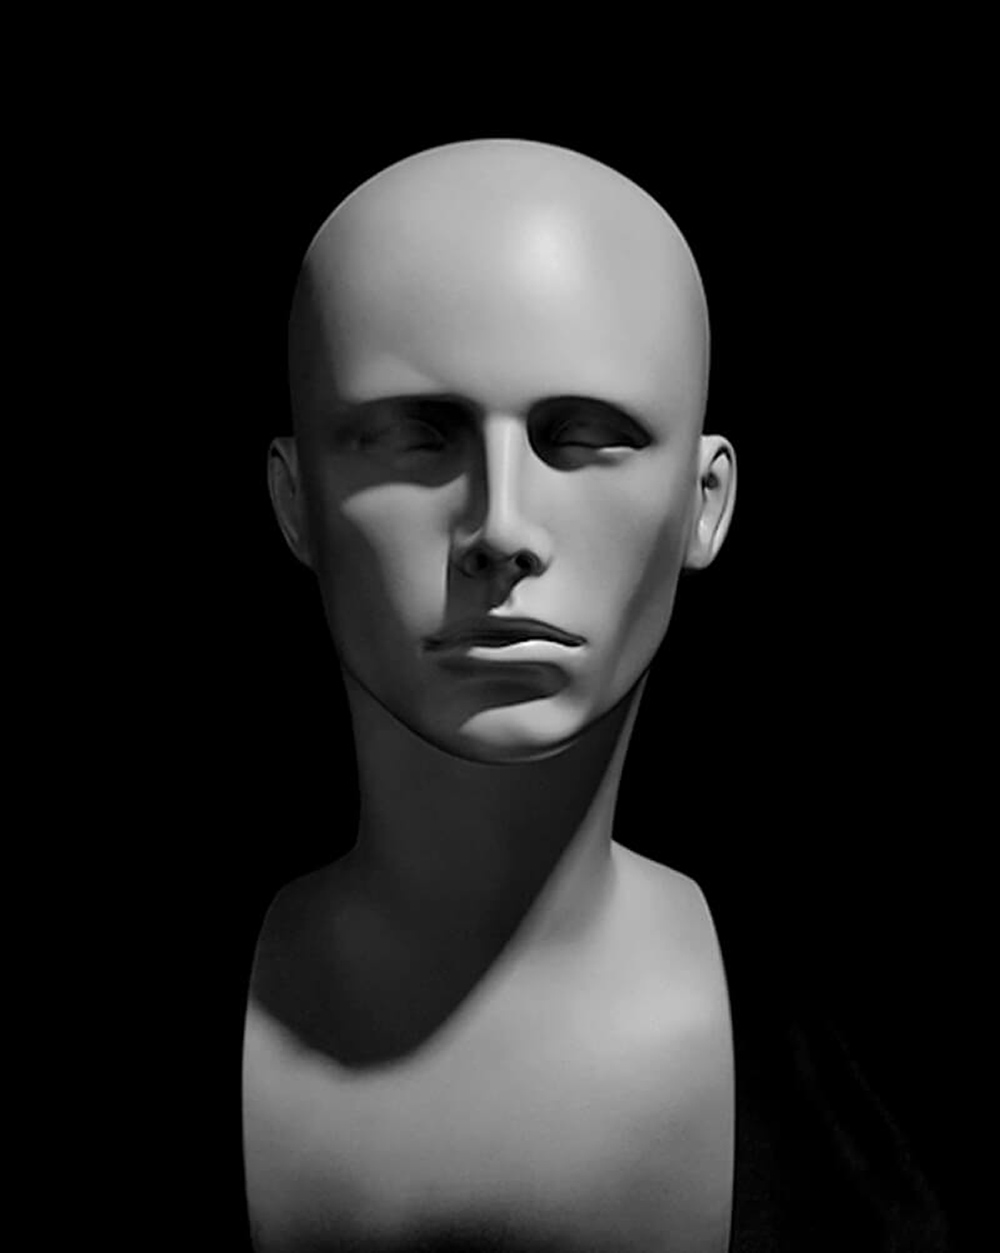
Rembrandt Lighting
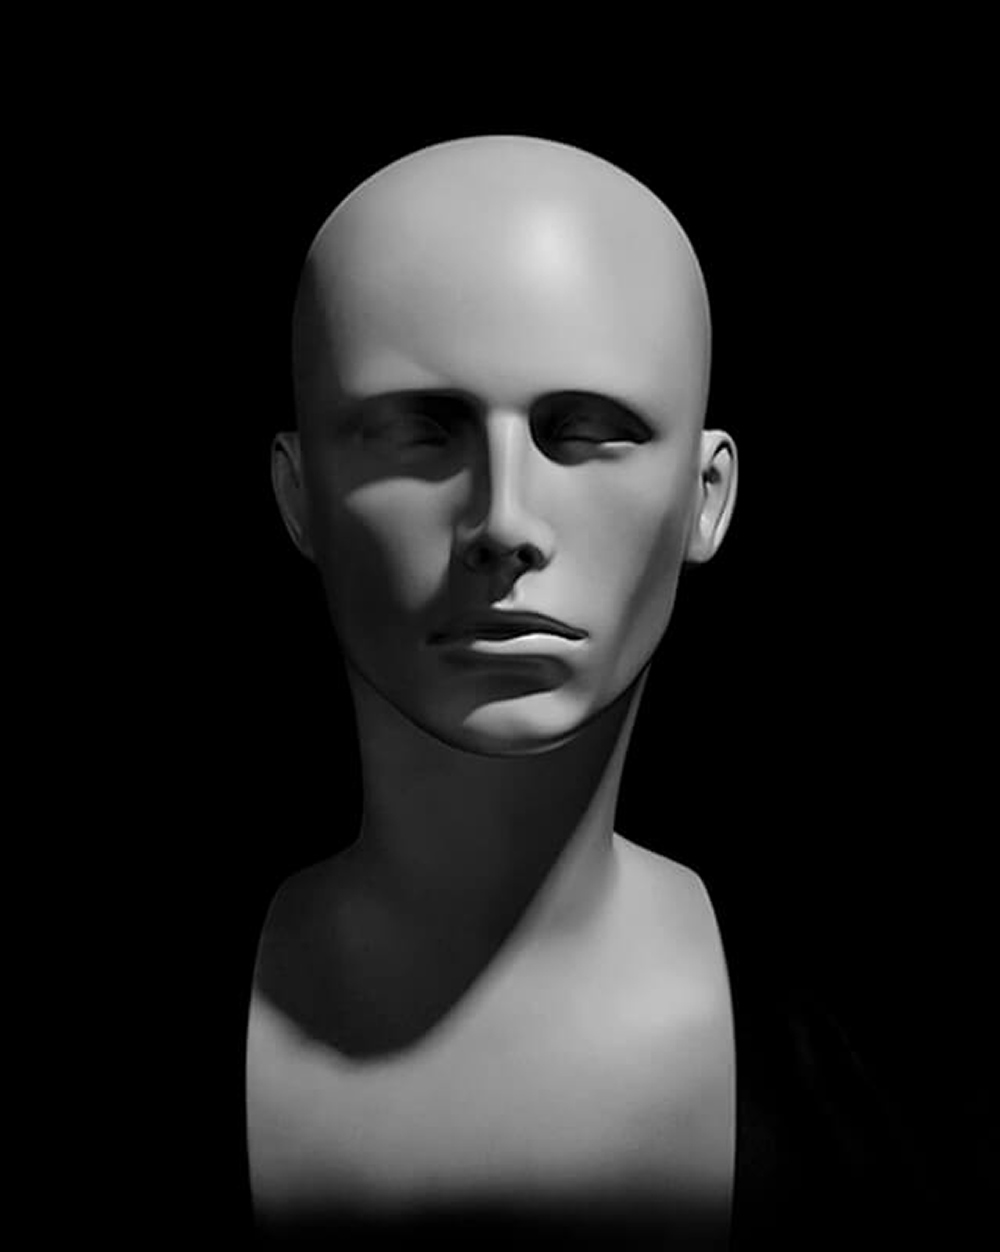
Rembrandt lighting is named after the famous 17th Century Dutch Painter Rembrandt. He often painted his subjects illuminated by high windows, which produced a distinctive triangle of light on the cheek of his subjects on the shadow side of their face.
When creating the classic Rembrandt lighting, place your lighting at an angle of roughly 45 degrees from your subject’s face. Raise it up to a point down towards your subject’s face at approximately 45 degrees. These angles are only a starting point for you to work from and work for me, both on location or in a studio. I will move the lighting around until it suits my subject and my interpretation of light on the subject’s face. This is because all faces and structures vary.
Rembrandt’s lighting is flattering and quite arty. If controlled, it is suitable for both portraiture and fashion work. This style of light works well on virtually any subject in any situation where light is added to a composition or scene regardless of whether they’re male or female. You know you have the format correct when the light overhead creates a shadow from the nose, which connects with the shadow on the cheek.
This lighting style is excellent for creating either classically styled portraits or dramatic portraits. If you want to create more dramatic portraits using Rembrandt lighting, you could increase the hardness by using the raw light from the flash unit. This means no diffuser such as I did on location in the sample picture.
I created contrast by removing the light control and overexposing the light source on location, which gives a harder light source similar to film lighting or Arri lighting.
This lighting is also perfect for Fine Art Photography when used with figure work and low lit lighting scenarios.
Loop Lighting
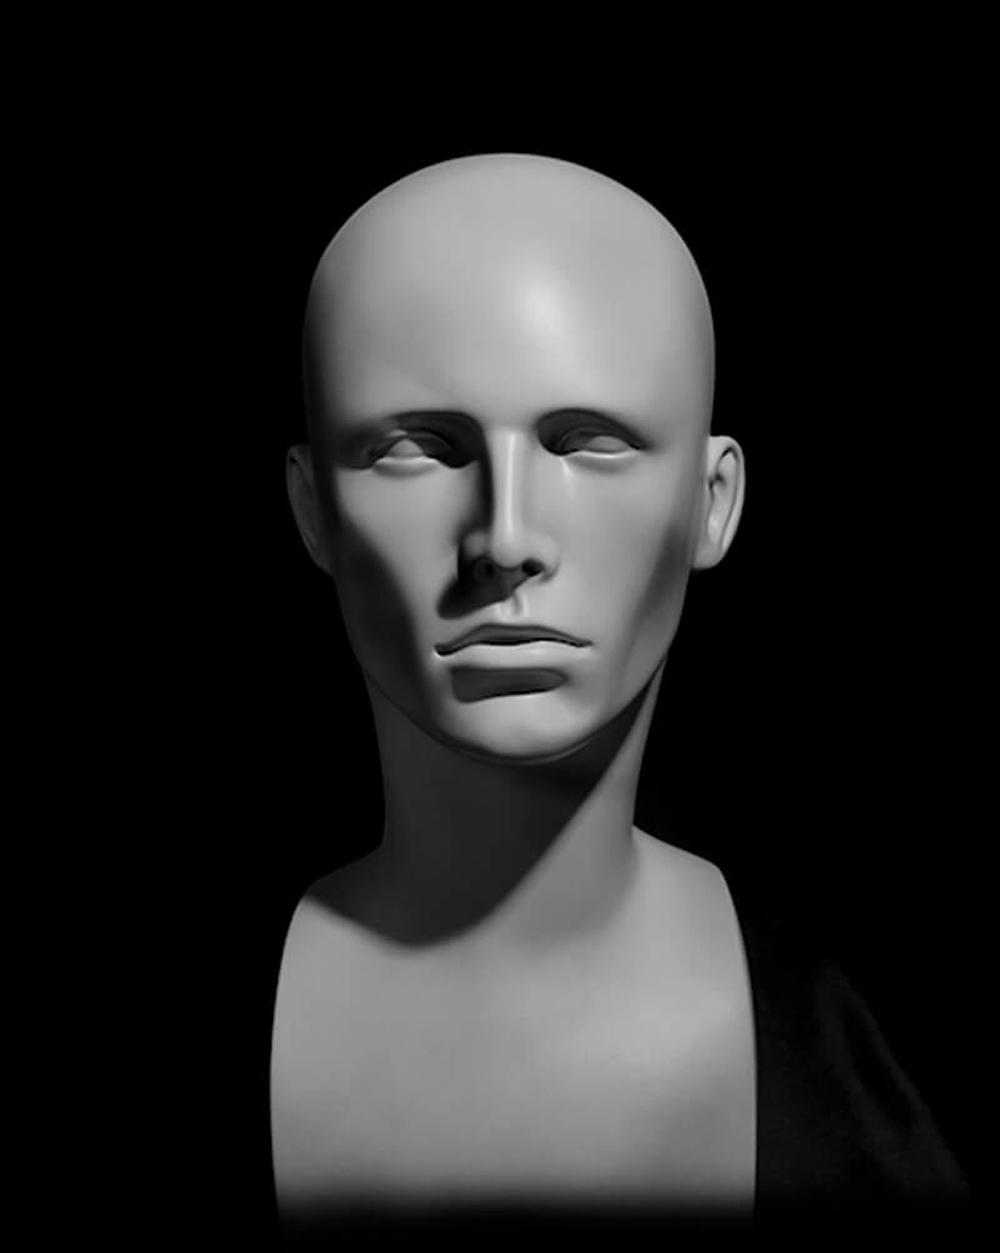
Loop lighting is very similar to Rembrandt lighting. However, the shadow from the nose doesn’t quite meet with the shadow from the cheek. Loop lighting is named for the shadow created on the subject’s face in the portrait. This simple lighting pattern is so-called for the “loop” shaped shadow created by the subject’s nose. If done correctly, loop lighting creates a circle-shaped shadow under and to the opposite side of your light.
The size and intensity of the loop vary from small and well defined to softer and more prominent, extending down toward the mouth. But the loop nose shadow does not touch the shadow on the cheek. This lighting technique is very similar to Rembrandt’s lighting, but the shadows on the cheek and nose do not meet.
Loop lighting is effective in studio work for portraits and campaigns. I used this lighting for the Superdrug campaigns and many others. Whilst it still works with direct lighting such as Arri & LED, it’s best suited to using a light source with a soft diffuser. However, for the purpose of this article, I am using direct LED light to highlight this.
To create Loop lighting, position your key light between 30-45 degrees in relation to your subject’s face, and raise your light to just above your subject’s eye level. Just make sure that the shadow from the nose on the cheek does not meet. This would then be classed as Rembrandt styled lighting.
Just like Rembrandt lighting, Loop lighting is a flattering style of light that works well on virtually any subject, regardless of whether they’re male or female. It also works for products so that it is not flat light and does throw light to create some light and shade, which, of course, gives contrast to the product. For me, there is nothing worse than flat lighting or copy lighting. I see this many times more so with some videographers who have no idea how to light and believe that adding two or three lights on a stand at the head height is perfect lighting!
Butterfly/Paramount Lighting
Butterfly lighting (also known as Paramount lighting) is created by positioning your light source directly centred and above your subject’s face. This creates a shadow under the nose which resemble a butterfly (Reason for the name). It is sometimes known as “Paramount Lighting” because this was the style of lighting that was often used by the Paramount movie studio to photograph their leading actresses back in the early days of Hollywood.
A lot of my more cinematic work features this type of lighting. Most of my early research into light as a student was from the Hollywood master photographers such as Sinclair Bull and George Hurrell. This particular lighting I absolutely love. When mixed with Film lighting or, better still, the older hot lights such as Blondes (2K Halogen) and Redheads (1K Halogen), the texture of the subject’s face literally looks like it emulsifies and has creamy looking skin and softens the skin. This is why the Hollywood master photographer’s pictures look so beautiful.
Butterfly lighting is more typically used for photographing women as it can accentuate cheekbones and will soften any wrinkles they may have. Is more flattering and forms a butterfly-shaped shadow under the subject’s nose, which is the source of the name. It is ideal for portraits to highlight the subject’s main features, like the nose and cheekbones. It creates a shadow under the subject’s nose and chin. These shadows make the subject look slimmer, and many cover shots will use this lighting style. Often a diffused reflector will be placed and the relevant angle to the subject. To create Clamshell lighting, you would use this light and a selection of reflectors close to and around the face for a brighter look portrait. Sometimes adding silver reflectors will enhance this look to a high degree and can be used more creatively with an avant-garde look overall.
Split Lighting
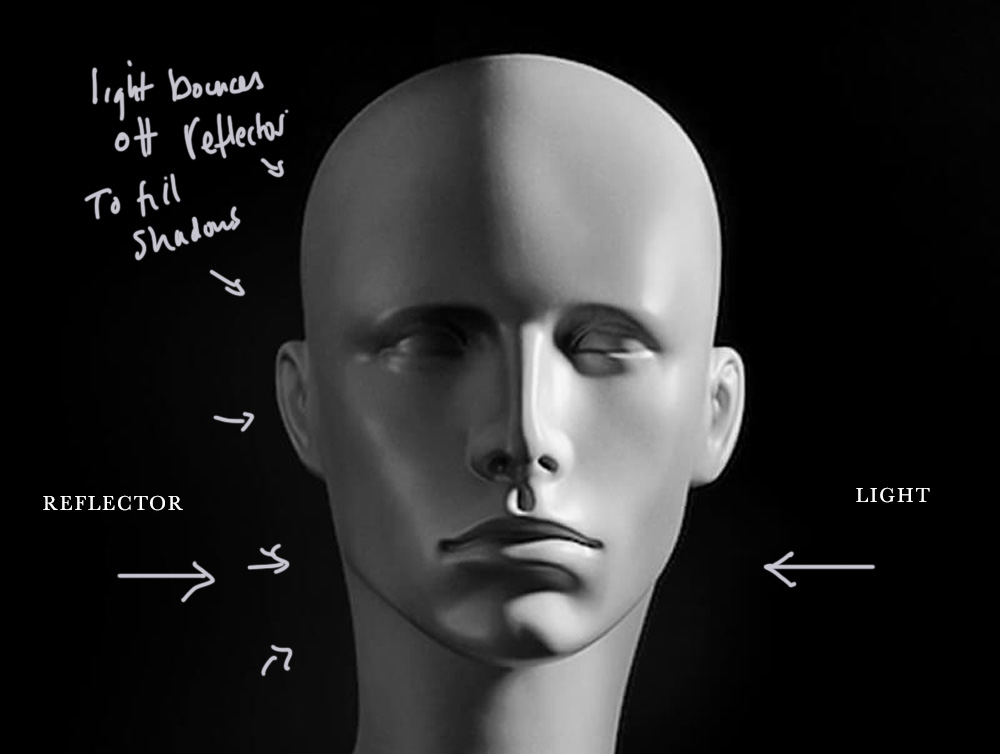
Split lighting uses a single light source to divide your subject’s face in two with light and shadow. It can be quite theatrical and mystical and often works really well when adding a small reflected light source from a reflector or V-Flat. It punches some low-level light back into the shadows giving some detail in the dynamic range, which can be pulled or pushed in post-production.
I personally will do just that in some of my portraits. Still, I might underexpose the reflected shadow area, as I can play around with the dynamic range for highlights, lowlights and clarity in the digital darkroom. It gives a unique effect not possible with film.
This style of lighting is excellent for creating dramatic or mysterious portraits. This is a typical style of lighting used in photographing people in the arts, such as musicians, magicians and artists and fine art interpretations.
If you are clever and can read the light, the split light can be used to illuminate the background. You can also use the light overspill to work for the background and in the shot below. This was one light (Red Head 1K) with barn doors. I used split lighting but positioned the model differently and allowed the light source to deviate and split into two. This allowed me to light the background and add exciting shadows from the barn doors on the light.
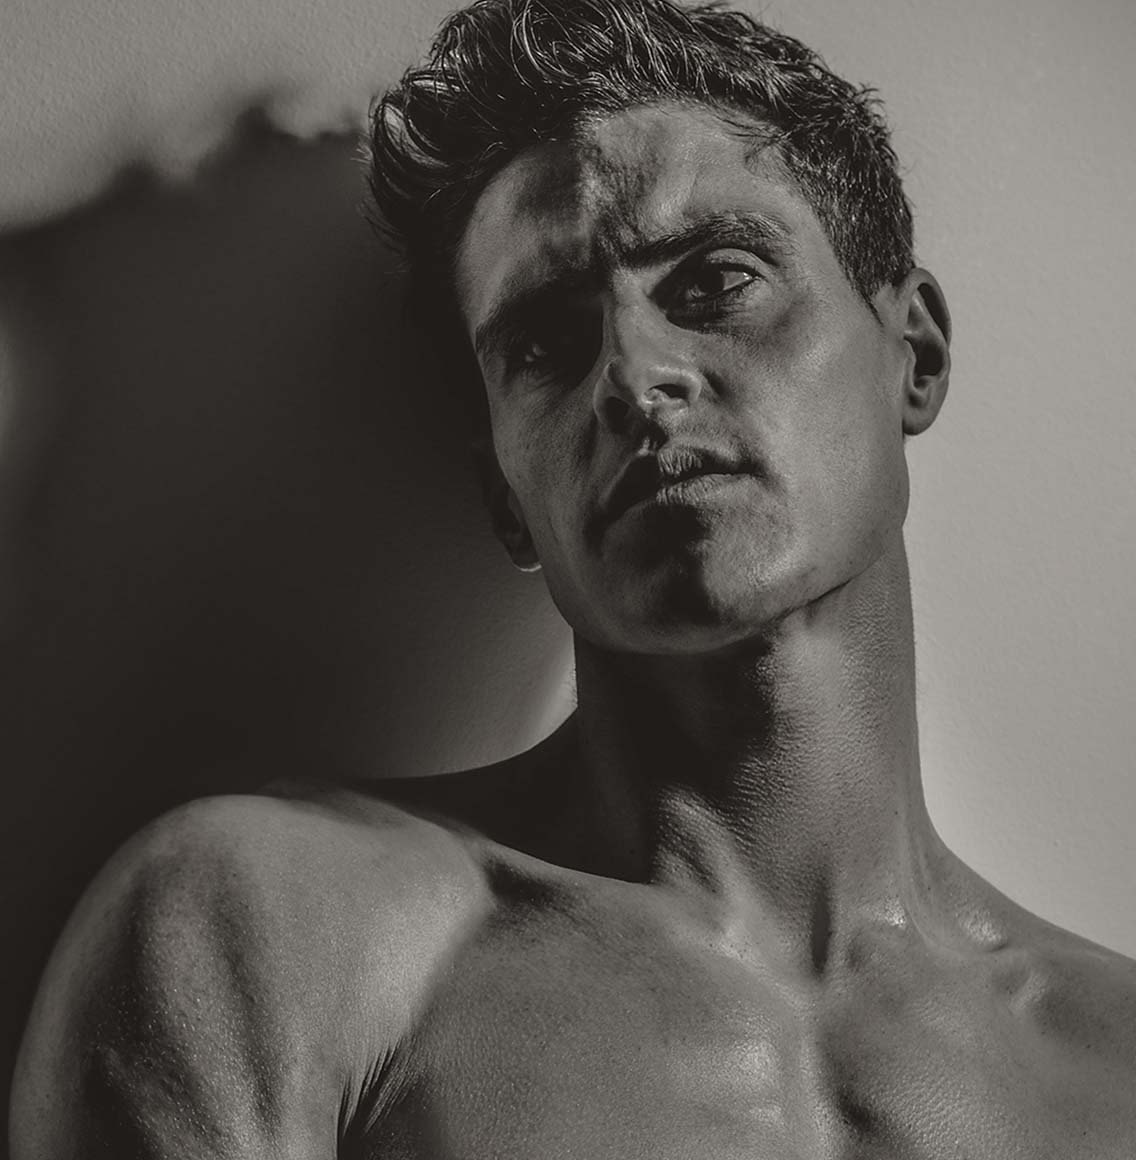 When setting up for split lighting, place your light at an angle of roughly 90 degrees from your subject’s face or directly to the left or right of your subject. Depending on your light source, moving the light away from the subject will still create the effect, more so with film lights such as Arri lights or LED’s, as the light projects further and sharper than flash. With flash, the shadows will get softer the further from the subject. To get around this with a similar effect as film lights, simply add a beauty dish with no baffles or diffuser or take off the light control and use raw flash or even a Speedlight.
Everybody’s face is slightly different, so you may have to adjust the position of your lighting (or the direction of your subject’s face accordingly. Remember, if your subject turns around their head, the light pattern on their face will change. If you want to maintain the “Split Lighting “look, you will have to adjust the position of your lights too.
Theatre or Theatrical Lighting
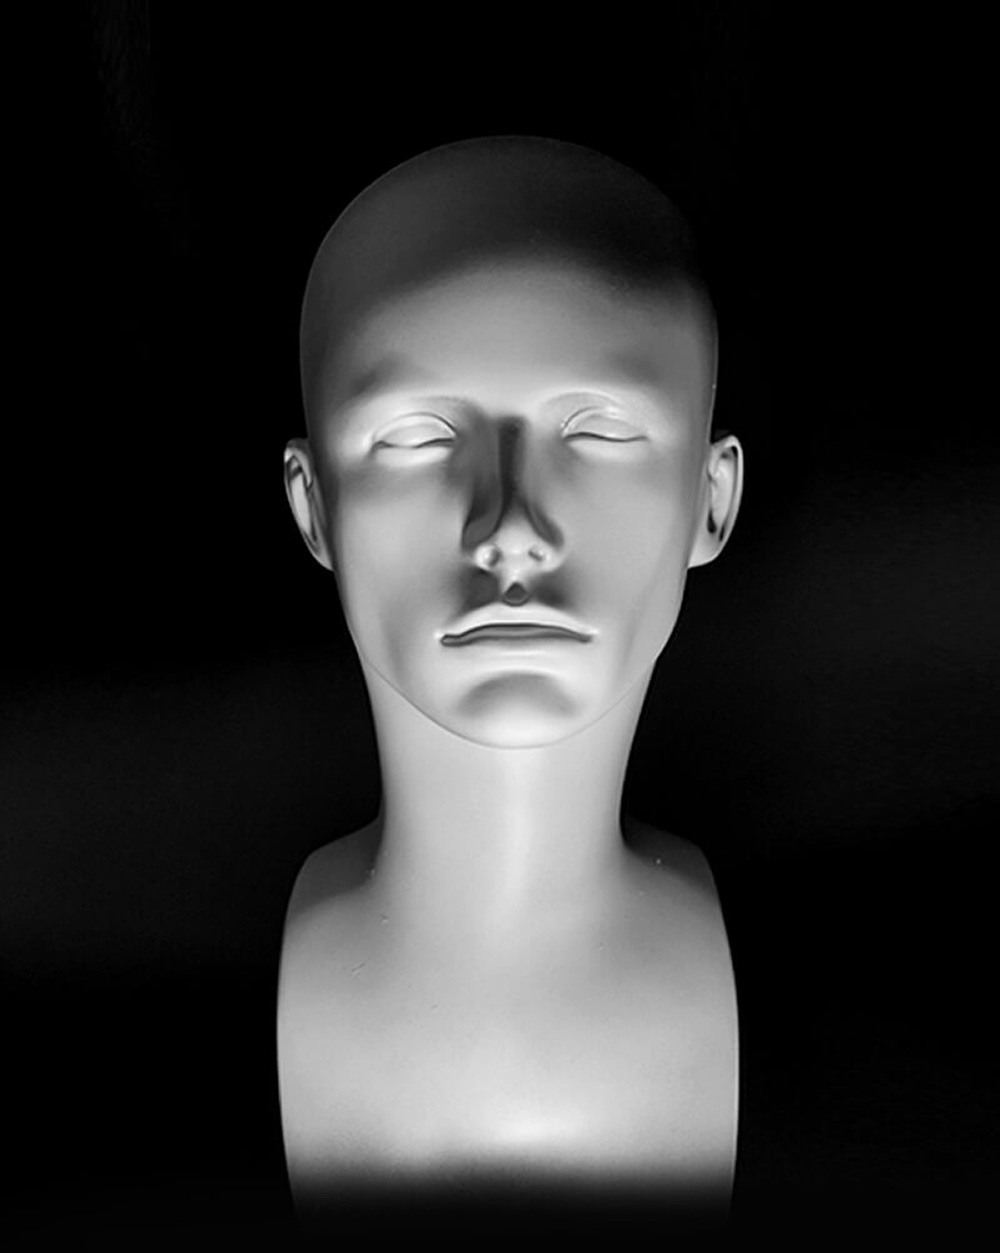
You may have seen this light in some films such as Horror or the Film Noir cinema film from the 40s to 50’s lighting is key to creating atmosphere and a mood. Cinematographers look to mix lighting all the time to create drama and effect. Uplighting is famous for being used by gaslight theatres from the early days when the gas lights were at the edge and around a stage, and the actor, singer or dancer would stand behind them. It was all about lighting the subject and not designed for any effect.
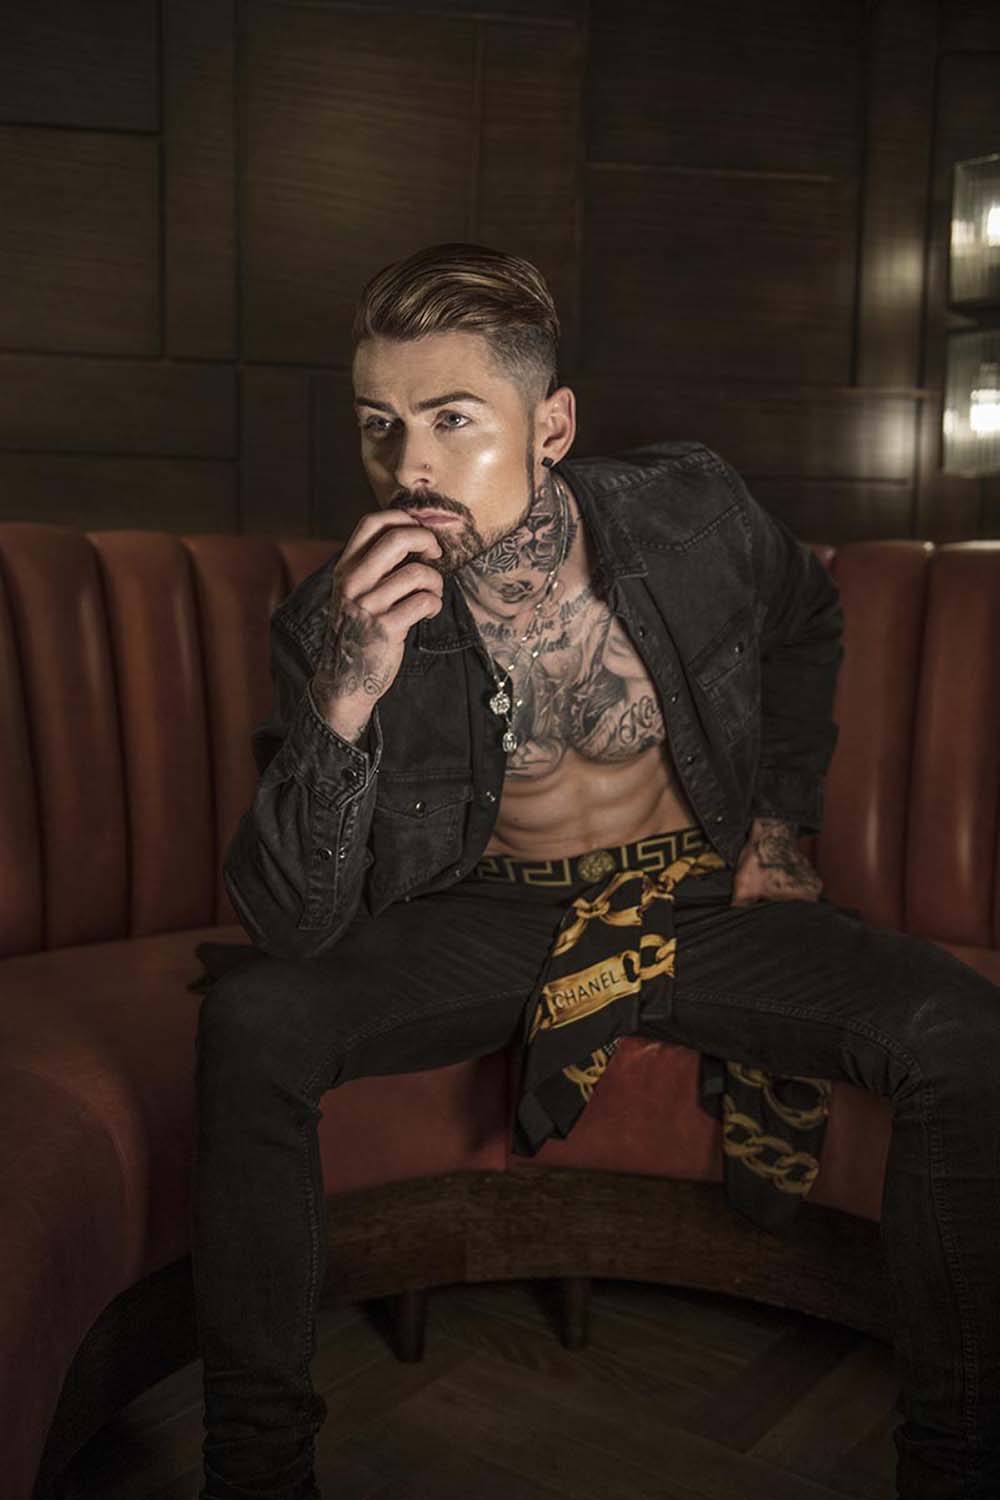
I successfully use this style of lighting for a more cinematic feel to my images and only relevant to the more creative or avant-garde look for me and my work.
Cinematic lighting can create depth to your composition. It can also add texture and flavour. One light at the height of your waist pointing up at the subject will give an unusual look. It’s not a typical lighting style, but when you ix this lighting with avant-garde clothing and makeup, it can look so good. This lighting creates drama wherever it is used.
Conclusion
Those are the four main lighting patterns traditionally used in portraits. Once you master the technique for each they map out into any other lighting types from flash to LED. Getting control of your light to create light, shape and form is essential to getting a diverse style of capture in your portfolio but equally having lighting techniques in your arsenal helps you work at different level.

