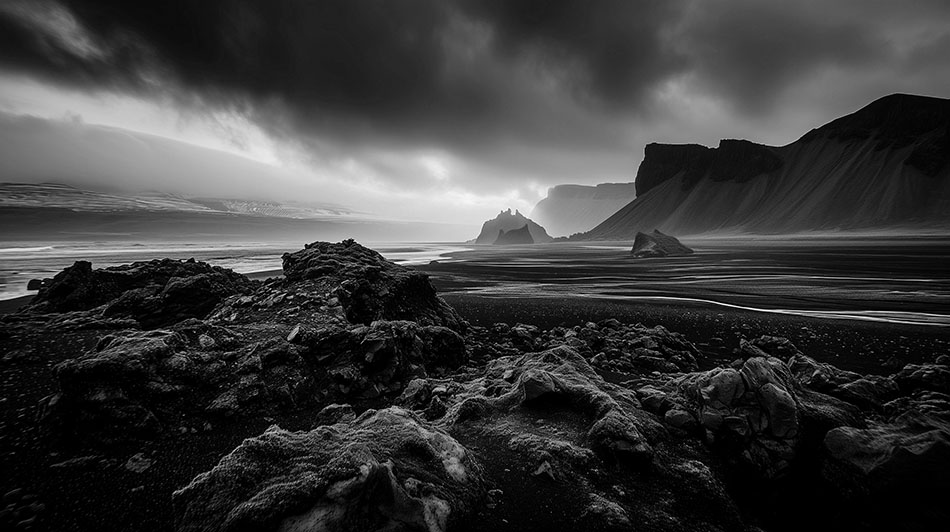
Zone system readings are essential to allow you to begin seeing the scene in front of you in terms of black and white before you even shoot it. Through the art of digital black-and-white photography, as I illuminate the potent capability of the zone system, whether my lens is fixed on the evolving tapestry of dawn or the pronounced contrasts that define urban contours, applying the zone system enhances my digital creations, bestowing upon them a visual language rich in detail and expressive power. By assimilating this timeless approach, you can harness the full spectrum of light and shadow that digital black-and-white photography offers.
In the world of photography, black-and-white images hold a special place. They have a way of evoking emotions and capturing the essence of a subject uniquely and profoundly. One of the critical techniques that has made black-and-white photography so captivating is the Zone System, pioneered by the legendary photographer Ansel Adams. This system allows photographers to control and manipulate the tonal range of their images, resulting in stunning and impactful black-and-white photographs. If you’ve ever wondered how to achieve that timeless and expressive quality in your black-and-white photos, this guide on the Zone System for Digital B&W Photography is here to help. Join us as we delve into the intricacies of this technique, exploring its origins and uncovering the secrets to creating breathtaking black-and-white photographs.
Zone System Key Takeaways
- Unlock the full potential of monochrome photography through the zone system, a linchpin in mastering exposure and dynamic range.
- Transform digital images by meticulously controlling the interplay of light and shadow to achieve unparalleled depth.
- Attain an intricate understanding of a scene’s luminosity, which is crucial for capturing the subtlest gradations and stark contrasts.
- Adapt the philosophies of Ansel Adams and Fred Archer to the digital realm, ensuring every black-and-white photo is a masterpiece.
- Reinvent your digital workflow by integrating zone system principles for imagery that stands the test of time and technology.
Understanding the Zone System in Digital Black and White Photography
As a passionate advocate for the aesthetic of monochrome imagery, I find joy in guiding fellow photographers through the intricacies of digital black-and-white photography. Embracing the zone system is essential for anyone seeking to elevate their craft. I aim to demystify this method, ensuring a comprehensive understanding of the zone system that will benefit your artistic endeavours. The transitions from film to digital have only enhanced the importance of this photographic approach.
Origins of the Zone System and its Digital Evolution
The foundations of the zone system were laid by renowned photographers Ansel Adams and Fred Archer. With meticulously calculated exposure and development control, the duo’s method revolutionised the level of detail retained in the shadows and highlights of an image. Fast-forward to the digital era, and the zone system has adapted seamlessly to the digital medium. Modern cameras bring forth many tools tailored for monochrome photography, translating visual zones into pixel-perfect black-and-white compositions.
Working with the Zone System in the Digital Age
In harnessing the power of today’s technology, photographers can implement the zone system to craft striking contrasts and nuanced grayscale gradations. Digital sensors and advanced metering systems allow for precise measurement and articulation of the visual zones. I continually advocate using these tools, as they offer unparalleled control over monochromatic expression, transforming how we perceive and construct our photographic narratives.
Recognising Visual Zones in Monochrome
Recognition of visual zones allows us to interpret and manipulate tonal ranges, ultimately creating a more impactful image. In digital black-and-white photography, each zone correlates to distinct tonal values that can be anticipated and controlled during capture. This produces images with emotional depth, enabling us to communicate our artistic vision. It’s more than capturing a scene; it’s about conveying a story through deliberate shading and lighting.
My purpose is not just to illustrate the mechanics of the zone system but to inspire you to apply it. This venerable method becomes second nature with practice, enhancing the dynamic range and depth of your monochrome visuals. Gone are the days of flat and lifeless black-and-white photos; enter a world where each shot you take is a deliberate step towards visual poetry.
 Implementing the Zone System in Your Digital Workflow
As an avid enthusiast of digital black-and-white photography, I’ve found that implementing the zone system can elevate the quality of my monochrome images to new heights. But how can one integrate this powerful tool into a digital workflow? Let me guide you.
The first step is to understand metering for the zone system. This involves assessing the light within the scene and deciding which zone the key elements belong to. Historically, Ansel Adams painstakingly measured the light of different sections of his compositions, a method that can still be applied in the digital realm.
By classifying the tones of the scene into different zones, from pure white to absolute black, I’m able to pre-visualise the final image even before the shutter clicks.
What does this mean for you? When you’re out with your camera, assess your scene’s brightest and darkest parts. Determine the exposure values of these elements and use them to set your camera, bearing in mind that zone V represents your middle grey. This approach ensures that you maintain details where they matter most.
However, using your camera’s histogram can be a modern twist to implementing the zone system. This real-time graph reflects the tonal distribution in your image, visually representing the zones across your digital black-and-white photography.
- Identify the critical tonal areas in the histogram
- Adjust your exposure to map these areas onto the desired zones
- Shoot in RAW to allow for greater flexibility during post-processing
Once I’ve made these adjustments, the right balance of contrasts and gradations is achieved, creating a harmonious tonal range true to the initial vision. The final stage of integrating the zone system within my digital workflow is post-production. I carefully tweak the RAW files, ensuring that each zone transitions smoothly into the next, carefully crafting a digital black-and-white photograph that stands out.
Remember, patience and practice are vital to mastering the zone system in your digital workflow. With due diligence, the results can be nothing short of stunning!
Mastering Exposure with the Zone System
Exposure to digital black-and-white photography is a delicate balancing act that I find exhilarating. The zone system, a systematic framework developed by the great Ansel Adams, has been an indispensable guide for photographers to understand the scene they are looking at. Modern digital cameras, with their histograms and indicators of dynamic range, offer unprecedented control, allowing photographers like me to manoeuvre through the complexities of exposure precisely.
Understanding Histograms and the Zone System
As a tool, histograms are extraordinarily insightful, displaying the tonal distribution of a photograph. My approach involves matching these graphical representations with the zone system’s scale to fine-tune exposure levels. For instance, by ensuring that vital tonal areas fall within certain zones, I can achieve a balance that reflects my creative vision in my digital black-and-white compositions.
 Utilising Dynamic Range to Your Advantage
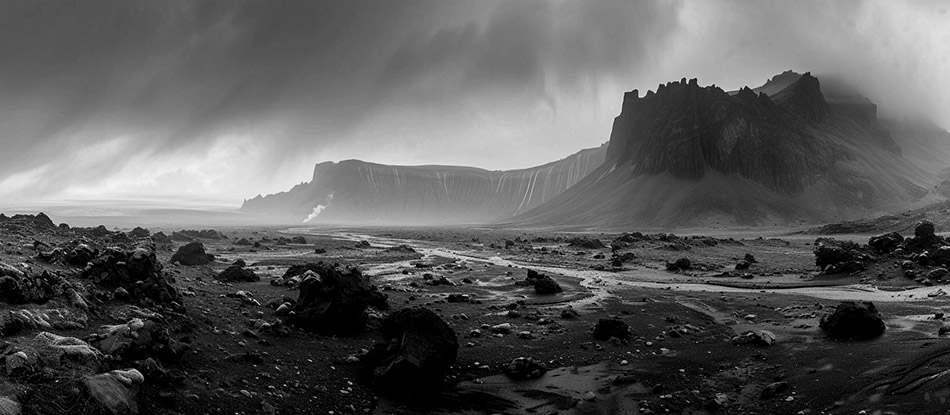
The profound beauty of monochrome photography lies in its tonal variations. The camera’s dynamic range denotes the spectrum of tones it can capture, from the deepest blacks to the brightest whites. With the aid of the zone system, I harness this dynamic range to expand or compress tones, accentuating textures and details. Careful metering based on the zone system ensures that shadows and highlights are recorded with the depth and nuance they deserve.
Zone System Digital Photography Exposure Techniques
The exposure techniques I employ are deeply rooted in zone system principles. Each step is deliberate and targeted, from choosing the correct metering mode to placing my exposure correctly within the zones. Calibrated to the nuances of digital black-and-white photography, these advanced techniques enable me to wield exposure as an expressive tool, transforming seemingly ordinary scenes into remarkable works of art.
“The zone system is more than a technique—it’s the language of light in photography, and mastering it in digital black and white photography brings out the very soul of the image.”
- Assessing tonal range with histograms for precise exposure decision-making
- Exploiting the camera’s dynamic range to render scenes with integrity
- Metering methods aligned with zone system principles
- Robust exposure adjustments to illuminate the desired narrative
My exploration into the zone system has revolutionised how I capture and conceive my monochromatic pieces, aiding me to narrate stories through nuanced shades of grey that resonate with an eloquence unique to digital black-and-white photography.
Applying the Zone System in Different Genres of Photography
As we delve into the nuances of the zone system, it becomes apparent how this methodology is not confined to a single genre but transcends various forms of digital black-and-white photography. Controlling light and dark areas within a frame allows me to capture the essence of any subject, be it the vastness of a landscape, the delicacy of human expressions, or the spontaneous rhythm of street life.
 Landscape Photography: Capturing Wide Dynamic Ranges
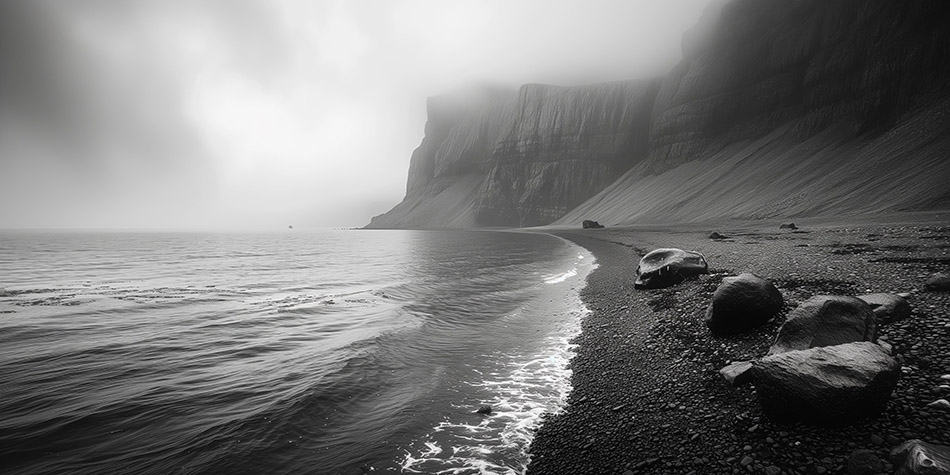
In landscape photography, the zone system is instrumental in rendering scenes with wide dynamic ranges. When I frame the grandeur of nature, I use the zone system to dissect light across different parts of the scene, ensuring that the intricacies of both shadows and highlights are preserved. This meticulous approach to capturing tonal variation highlights the textures and depths that make black-and-white landscapes genuinely compelling.
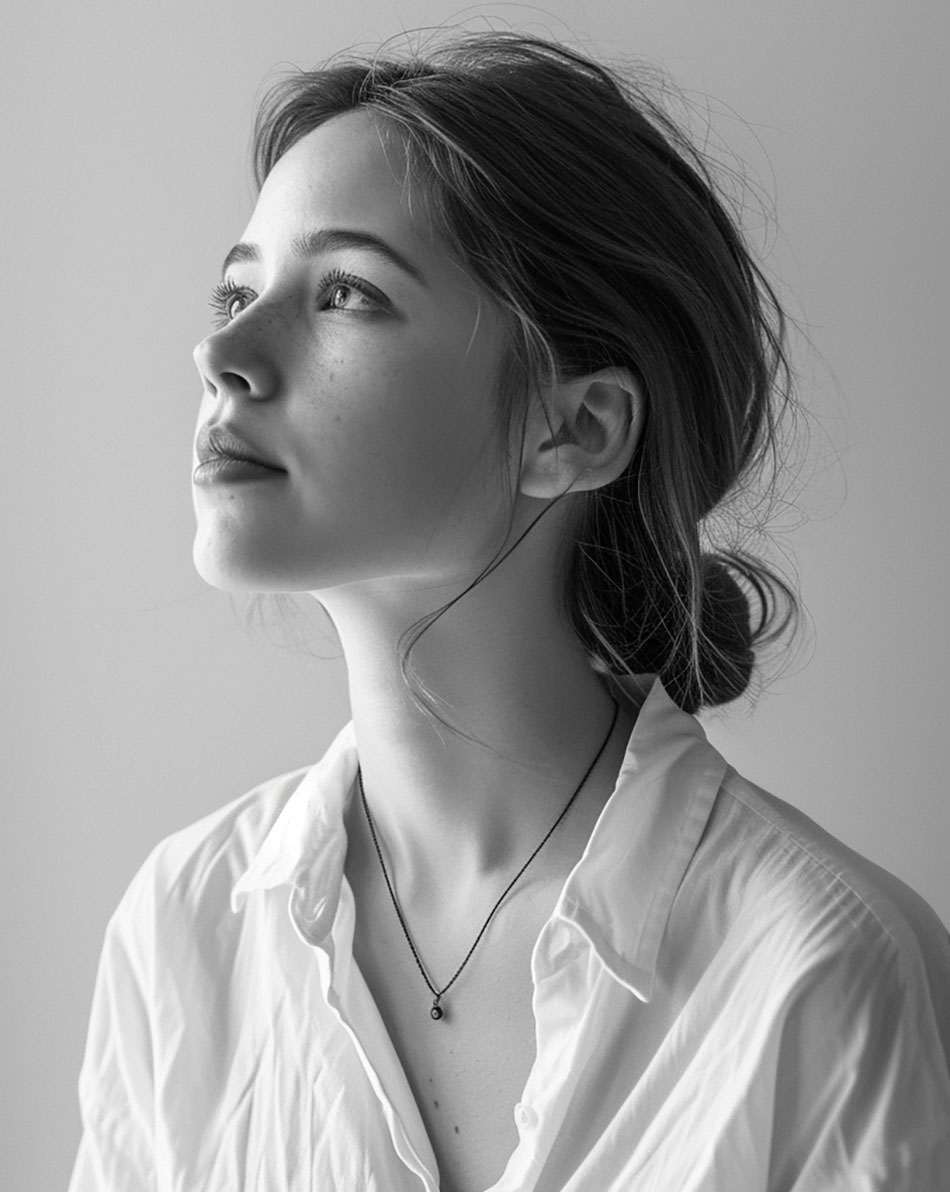
Portrait Photography: Controlling Skin Tones and Background Exposure
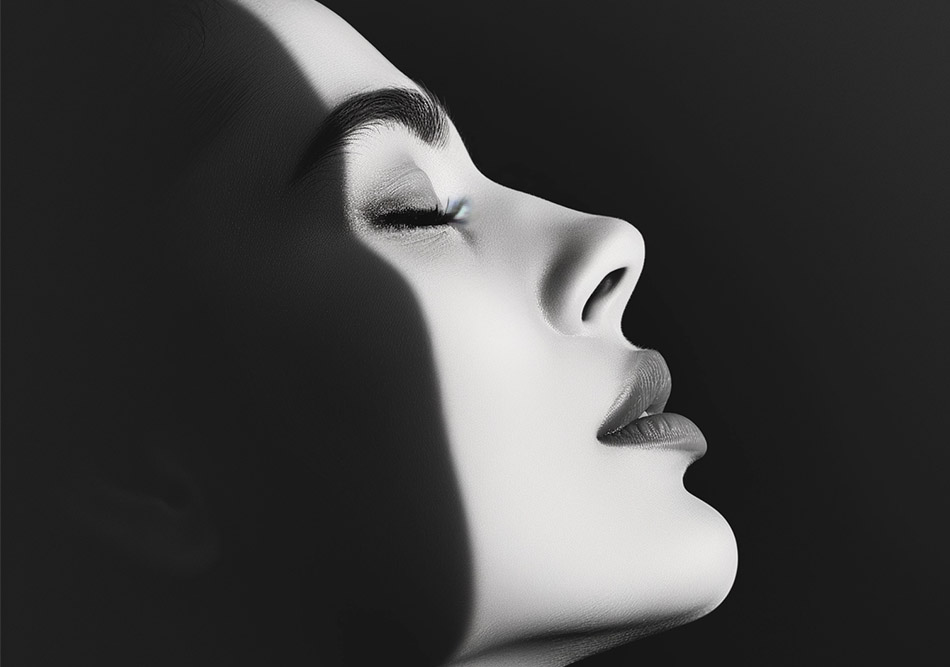
Transitioning to portrait photography, the zone system strengthens in ability to manage skin tones against varied backdrops. Here, I mainly focus on assigning suitable zones to a subject’s facial features, creating a balanced interplay between light and shadow that accentuates the emotion and character of the subject. Careful consideration of the background helps draw the viewer’s eye to the subject while nurturing a harmonious exposure throughout the frame.
Street Photography: Quick Settings Adjustments for Dynamic Scenes
Lastly, with its unpredictable and swiftly changing scenarios, street photography benefits immensely from understanding the zone system. Adjusting camera settings on the fly becomes second nature as I evaluate the light within the scene and swiftly zone in on the key elements I want to highlight. This ensures a consistent quality and depth in the snapshots of life that unfold in the urban landscape.
Incorporating the zone system across different facets of digital black-and-white photography invites a well-rounded skill set that enhances one’s visual storytelling ability. Whether it’s the serenity of landscapes, the intimate dance of shadows in portraits, or the candid beats of the street, the zone system remains a timeless ally in the pursuit of photographic mastery.
The Zone System and Post-processing
As a dedicated practitioner of digital black-and-white photography, I’ve come to appreciate post-processing’s nuanced role in realising the artistic vision that begins in the camera. The zone system, with its meticulous attention to tonal gradation, isn’t confined to the moment of exposure; it extends its influence into the digital darkroom, transforming how we enhance and refine images post-capture. Properly utilised, this system is pivotal in bringing depth, texture, and contrast to monochromatic imagery.
The foundational principles of the zone system invariably shape my post-processing routine. To achieve that desired tonal balance, I adapt my approach to consider the tenets of this time-honoured technique. It’s a framework that has governed my exposure settings and informed my post-processing decisions—a methodology that perfects the monochrome image beyond the shutter’s release.
- Inspection of the histogram is necessary to ensure the distribution of tones aligns with the zone system’s gradation.
- Adjustment of individual zones using selective editing tools to sculpt the light and shadow for a dynamic range true to black and white photography’s rich heritage.
- Applying dodge and burn techniques, hearkening back to traditional darkroom practices, highlights or subdues specific zones, thereby honouring the desired luminance my composition requires.
With these post-processing strategies, I find the zone system to be an indispensable ally. It guides my digital workflow, prompting me to consider each zone’s contribution to the image’s overall tonality. Indeed, in modern digital black-and-white photography, the zone system still serves as a compass and map, directing us towards visual narratives marked by clarity and aesthetic rigour.
“Embrace the zone system in your digital black and white post-processing to distil chaos into harmony, illuminating the shades between light and shadow.”
Integrating the discipline of the zone system into post-processing expresses a commitment to photographic excellence. As I manipulate pixels on the screen, I’m reminded of the interplay of light that Ansel Adams masterfully harnessed. It’s this interplay that I aim to replicate and reinterpret in the digital age, ensuring that the integrity of the scene I witnessed is echoed in every highlighted detail and shadowed contour.
The pursuit of tonal perfection is an unending quest in digital black-and-white photography, with post-processing serving as a critical stage for artistic expression. Whether in the balance of highlights and shadows or the nuance of mid-tones, the zone system continues to be my guide—attuned to the visual poetry of monochrome and the promise of digital technology.
My Take on Zones
Implementing the zone system into your digital workflow isn’t simply about following rules; it’s about developing a keen eye for detail and light. It calls for a reflective approach to photography, encouraging you to consider each zone and how it contributes to the overall narrative of your imagery. Furthermore, the nuances of managing exposure become almost automatic with practice, creating remarkable works that harness the full spectrum of greys, from the deepest blacks to the brightest whites.
In summary, the zone system remains a fundamental cornerstone for photographers who seek to excel in digital black-and-white photography. By conscientiously applying the techniques discussed, you are more likely to produce striking images with rich gradations and textures. Whether your passion lies in landscapes, portraits, or the spontaneity of street photography, the zone system is your ally in translating the world into monochrome magnificence. As we draw this conclusion, remember that photography is a perpetual journey of learning and expression, and the zone system is a key that unlocks a myriad of creative possibilities.
FAQ
What is the zone system in digital black-and-white photography?
Why is the zone system important in monochrome imagery?
How does the zone system work in the digital age?
How can I recognise visual zones in monochrome photography?
How do I implement the zone system in my digital workflow?
To implement the zone system in your digital workflow, start using spot metering or exposure metering to measure the brightest and darkest areas of the scene. Then, adjust your camera settings to ensure the essential elements fall within the desired zones. Regularly review the histogram to make exposure adjustments as necessary.
How can I master exposure using the zone system?
What exposure techniques are specific to the zone system in digital photography?
How can I apply the zone system to different genres of photography?
What role does the zone system play in post-processing?
| Zone | Description | Relative Exposure | F-Stop Adjustment |
|---|---|---|---|
| 0 | Pure black | -5 stops | -5 from metered |
| I | Near black | -4 stops | -4 from metered |
| II | Textural details in dark | -3 stops | -3 from metered |
| III | Dark materials | -2 stops | -2 from metered |
| IV | Dark foliage/shadows | -1 stop | -1 from metered |
| V | Middle gray | 0 stops | Metered exposure |
| VI | Light skin/soft light | +1 stop | +1 from metered |
| VII | Very light skin | +2 stops | +2 from metered |
| VIII | Lightest tones w/texture | +3 stops | +3 from metered |
| IX | Slight tone, no texture | +4 stops | +4 from metered |
| X | Pure white | +5 stops | +5 from metered |
When applying the Zone System to portrait photography, especially in a controlled environment like a studio with a single light source, the primary goal is to determine the optimal exposure for your subject’s skin tone and ensure that important details fall within the desired zones. The choice of f-stops and how to meter for light, middle, and dark tones can greatly influence the mood and detail of your portraits.
1. Metering and Zone Placement
First, let’s discuss how to meter the different tones within your scene:
- Light Tones (e.g., Caucasian skin tone, light clothing): You might want these to fall within Zone VI to ensure they are well-exposed but still retain detail. To meter for these, take a reading off the subject’s light-toned areas and adjust your exposure to place these tones in Zone VI, which is one stop over the metered value for middle gray (Zone V).
- Middle Tones (e.g., gray clothing, average skin tones): These should naturally fall within Zone V, which represents middle gray. Metering these tones should give you a straightforward reading without any adjustment needed to place them within their zone.
- Dark Tones (e.g., dark hair, shadows): To preserve detail in darker areas, you might aim for Zone III or IV. For Zone III, which maintains detail in darker materials, you would underexpose the metered value by two stops.
2. Choosing F-Stops
The choice of f-stop affects both exposure and depth of field (DoF), which is crucial in portrait photography for isolating the subject from the background or ensuring that all facial features are in focus.
- For a shallow DoF (blurred background), choose a wide aperture (small f-stop number, e.g., f/1.4, f/2.8). This setting is ideal for individual portraits where you want to emphasize the subject by blurring the background.
- For a greater DoF (more of the scene in focus), select a narrower aperture (larger f-stop number, e.g., f/8, f/11). This setting is useful when you want the background to be more recognizable or when the subject is not parallel to the camera sensor, requiring more of the scene to be in focus.
3. Practical Metering Example
- One Light Setup: Position your key light at a 45-degree angle to the model. Use a handheld light meter to take an incident reading near the model’s face, pointing the meter towards the camera to capture the light falling on them.
- Meter for Middle Tones: If your model has average skin tones, meter directly off their face without adjustments to place it in Zone V. This will be your baseline exposure.
- Adjusting for Light and Dark Tones:
- For lighter tones (e.g., light skin, white clothing), you’d want to overexpose by one stop from the baseline to place these elements in Zone VI.
- For darker tones (e.g., dark shadows, black clothing), underexpose by two stops from the baseline to achieve detail in Zone III.
4. Example Settings for Portrait
- Baseline Exposure for Middle Tones: Suppose the meter reading for the middle tones is f/8 at 1/125 sec. This is your Zone V setting.
- Adjusting for Light Tones: To place light skin tones or highlights in Zone VI, you would open up one stop (e.g., to f/5.6 at 1/125 sec).
- Adjusting for Dark Tones: To retain detail in darker areas (Zone III), you would stop down two stops from the baseline (e.g., to f/16 at 1/125 sec), but this adjustment is more about knowing where you want the dark tones to fall rather than an actual camera setting for the entire portrait.

 Implementing the Zone System in Your Digital Workflow
 Utilising Dynamic Range to Your Advantage
 Landscape Photography: Capturing Wide Dynamic Ranges