In the world of photography, editing is just as important as the shot itself. Are you missing out by choosing colour over monochrome in your edits? I’ve learned how Adobe Lightroom can take my photos to the next level. Since 2007, it’s become key for photographers at all levels. It makes editing photos efficient and lets me enhance each shot deeply.
This article will show you how to get the most out of Lightroom. I’ll share tips on improving your editing skills and making your workflow better. From importing images to exporting polished photos, I’ll cover strategies to boost your efficiency and get great results fast.

Key Takeaways
- Adobe Lightroom aids in quick and efficient image processing.
- Structured workflows can improve editing speed and effectiveness.
- Mastering presets can lead to consistent and professional results.
- Utilising both the mobile and desktop versions enhances productivity.
- Advanced techniques can significantly beautify photographs without external software.
Introduction to Adobe Lightroom
Adobe Lightroom is a key tool for digital photography. It offers a place to manage and edit photos. This software changed how photographers work with their photos, making it easier to keep track of them and edit them.
It uses a non-destructive editing method. This means it changes the preview images but keeps the original files safe. This way, you can always go back to the original photo.
The Lightroom Catalog is like a recipe book for your photos. It keeps track of all the changes you make to each photo. This makes editing and managing photos easier and more organised.
Many users moved to Lightroom after Apple stopped making Aperture. They found it easy to use and with lots of help available. For beginners, Lightroom has great tutorials that make learning it easier than Adobe Photoshop.
Lightroom costs just $9.99 a month, making it affordable for new photographers. It’s great for improving your photo editing skills. It’s designed to make editing photos easier, making it a must-have for serious photographers.

The Importance of a Structured Workflow
A well-defined creative workflow in Adobe Lightroom is key for managing and editing digital photos. It makes photo editing easier by breaking it down into steps. From importing images to exporting them, it keeps my process smooth and focused on creativity.
What is a Lightroom Workflow?
A Lightroom workflow is a set of steps I follow for my images in Adobe Lightroom Classic. First, I set up import preferences to keep my photos organised and backed up. The Library module helps me manage my photos well, making them easy to find.
This way, I can easily look through my collection of 80,000 photos on an external hard drive. It helps me keep everything in order for my projects.
Benefits of a Systematic Approach
Having a structured workflow brings many benefits. It makes me more efficient, saving time on repetitive tasks. This lets me focus more on editing and improving my photos.
Using Lightroom’s features, I can quickly apply presets to images during import. This speeds up the process and improves the quality of my edits. A systematic approach also helps spot duplicates, keeping only unique photos in my collection.
Overall, a strong creative workflow creates a space where creativity thrives.
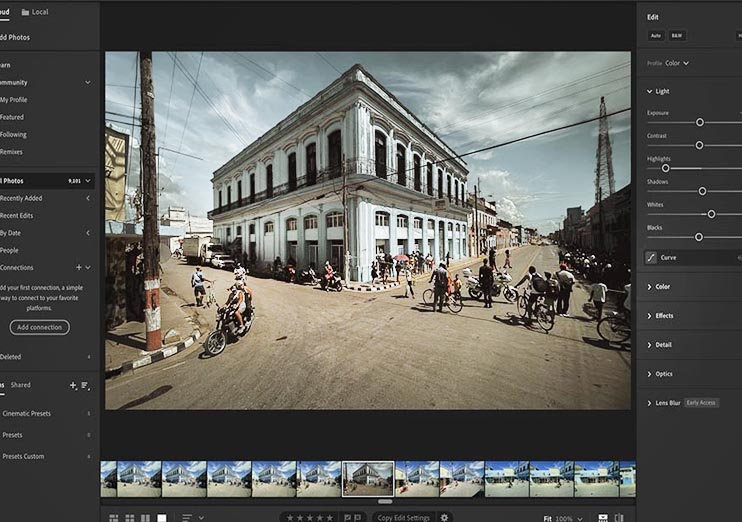
 Lightroom Mobile Desktop – Image Havana Cuba ©jamesnader
Navigating the Lightroom Interface
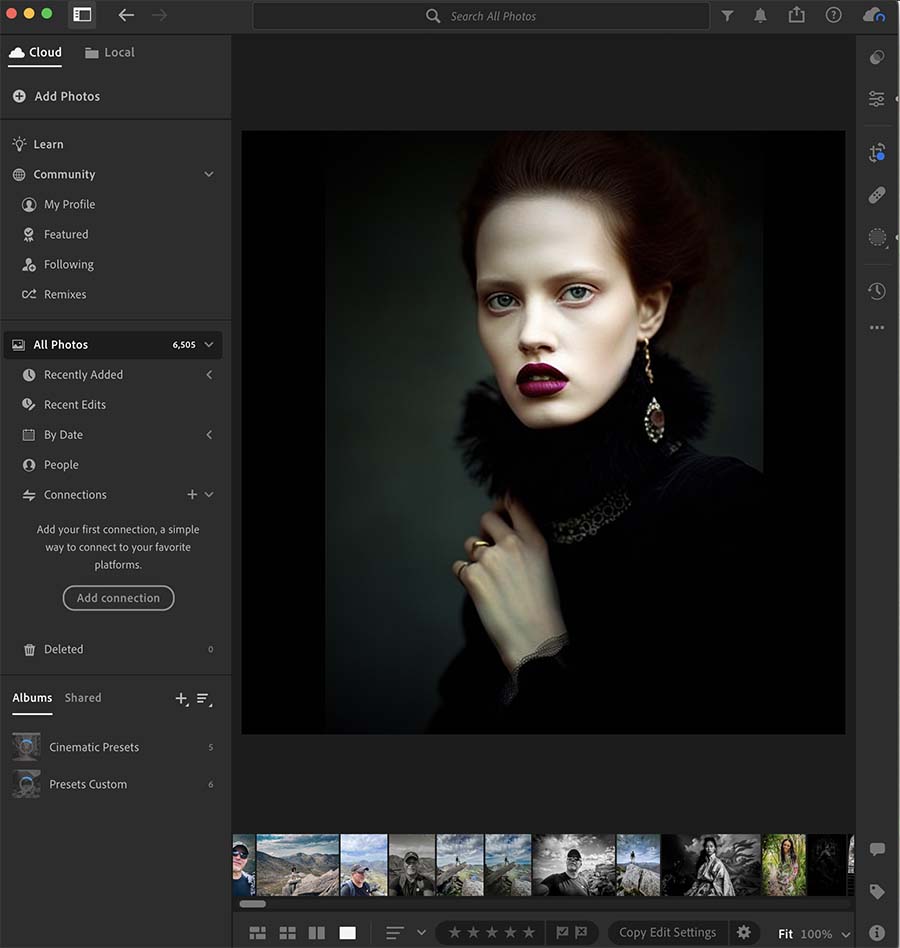
Learning how to use the Lightroom interface is key for editing photos well. It has a clear layout that helps me work efficiently in different editing areas. At first, it had five modules for my tasks. Then, Lightroom 4 added two more, making my editing better.
The Library Module is at the heart of the software. It helps me organise and make basic changes to my photos easily. The layout has a main area and four panels: the Module Picker, Film Strip, Left Module Panel, and Right Module Panel. This setup makes my work flow smoothly and improves my experience with the software.
The interface is designed as a single window, making it easy to move around and focus on my work. While it’s easy to use, one thing that can be tricky is the lack of custom keyboard shortcuts. Learning these shortcuts helps me move faster and keeps my workflow smooth.
Importing Photos into Adobe Lightroom
Importing photos into Adobe Lightroom is the first step in my editing workflow. It lays the groundwork for a well-organised process. It’s vital to set up import preferences to keep images in order and backed up.
Setting Up Import Preferences
When importing, I have options like Copy, Copy as DNG, Move, and Add. Each option has its own benefits. I often choose Copy to keep my original files safe while moving them to my drive.
It’s important to keep my Lightroom catalog on one drive to avoid losing files. Naming the folder clearly, like “My Name Lightroom” or “Myname – 2020 – Catalog,” makes it easier to find later.
Organising Photos During Import
Organising photos during import is key to a tidy Adobe Lightroom setup. I sort them by date or event. Renaming with a “Date – Filename Template” makes them easy to find later.
When bringing in files from an SD card, copying them first is wise. This prevents issues with MOVE and ADD options. Checking “Don’t Import Suspected Duplicates” helps avoid duplicates, making my work smoother.
Having a systematic way to import photos makes editing in Adobe Lightroom more efficient. It improves my overall experience.
Culling and Organising Your Images
After importing my photos into Adobe Lightroom, I focus on culling images. With 3,000 to 5,000 photos from an event like a wedding, I need a good system. In Loupe View, I quickly scan through my images and mark them for review.
Flags help me pick out my chosen images from those needing another look. Star ratings are another way to sort photos. I use a simple 0-5 star system, with five stars for my best shots. This makes it easy to mark photos as I go.
I can also use colour labels for a visual system. Different colours mean different things, making it easier to sort photos. This helps keep my photos well-organised.
Adobe Lightroom has tools like Survey View and Compare View that help with culling. Survey View lets me see several photos together, and Compare View is for a detailed look at two images. These tools are great for checking focus and sharpness.
Deleting photos I don’t need makes my workspace cleaner and speeds up editing. It also saves storage space. By focusing on high-quality images, my workflow gets better. This way, I can show off my best work easily.
In summary, getting good at culling images and organising photos boosts my productivity. It makes my photography work smoother.

Editing Photos in the Develop Module
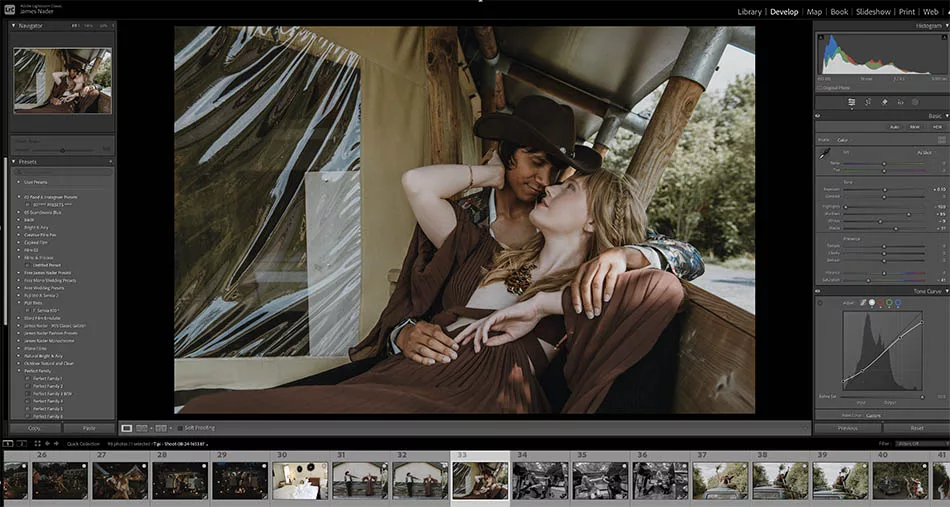
The Develop module is the heart of Adobe Lightroom. It’s where I make my photos pop with various editing techniques. I can work on raw files, JPEGs, or TIFFs to make them look amazing. The editing process has three main steps, from basic to advanced, helping me improve my photo retouching skills.
Round 1: Basic Adjustments
In the first round, I start with key edits to lay a strong base for my photos. The Basic panel lets me adjust things like exposure, contrast, and white balance. I use the White Balance sliders to change the colour temperature, setting the mood I want.
Then, I tweak the saturation and vibrance to boost the colours. This keeps them looking natural but more vibrant.
Round 2: Creative Adjustments
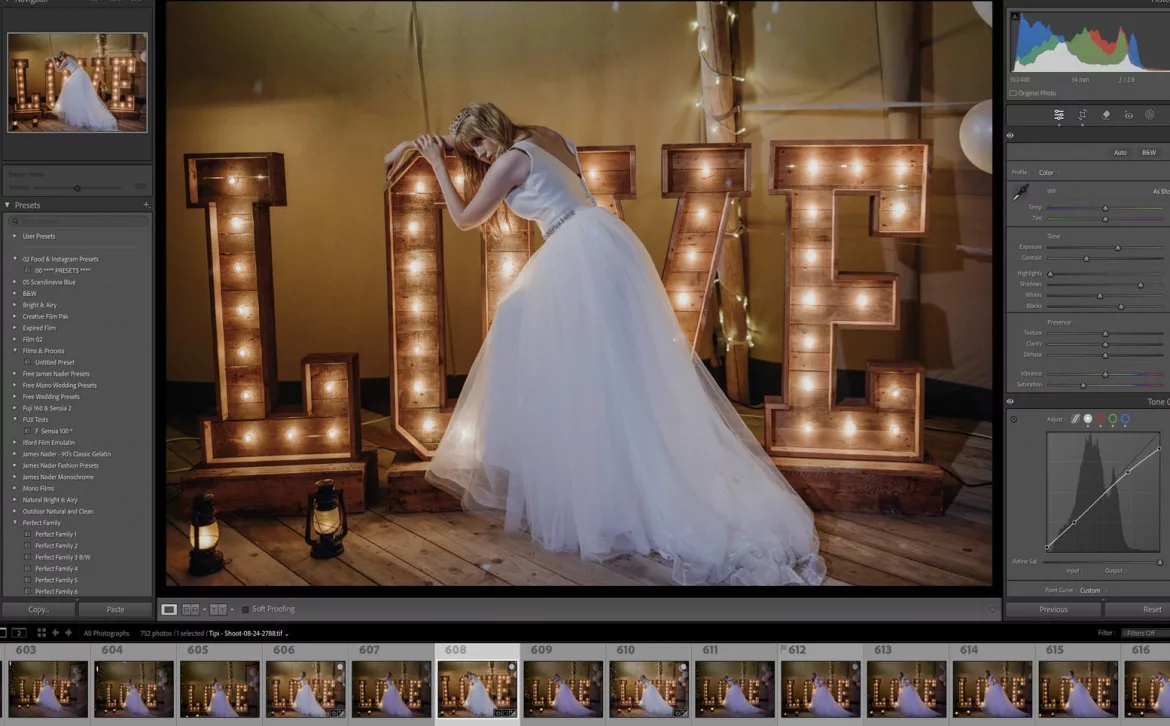
This round is all about being creative. Adobe Lightroom presets are a big help here, giving my photos a unique look quickly. I also play with the Tone Curve and colour grading for detailed colour changes.
This way, I can get the exact look I want without losing the photo’s original feel.
Round 3: Local Enhancements
For the final round, I focus on making specific parts of the photo stand out. I use brushes and filters for this, making changes only where I need them. This is great for enhancing details and fine-tuning the composition.
With these targeted adjustments, my editing wraps up, leaving me with a polished, professional image.
| Adjustment Type | Purpose | Tools Used |
|---|---|---|
| Basic Adjustments | Establish clarity and balance | Basic panel controls |
| Creative Adjustments | Add artistic flair | Adobe Lightroom presets, Tone Curve |
| Local Enhancements | Target specific areas | Brushes, filters |
Utilising Lightroom Presets for Efficiency
Lightroom presets can change how I edit photos, making my workflow much better. With just one click, they apply settings to my images, saving a lot of time. This is especially useful for event photographers who work with lots of photos.
Presets make sure my edited photos look the same. If I’m shooting in the same lighting or focusing on similar things, presets keep my photos looking consistent. I can make my own presets or try out others to see what works best for me.
Presets aren’t just for editing photos. They can also speed up tasks like adding metadata or exporting files. This makes my creative process faster.
Trying out different presets can help me discover new ways to edit photos. I can combine presets for unique effects or use them regularly for extra style. Using presets helps me learn more about Lightroom and create my own presets.
In short, whether I’m a pro photographer or a hobbyist, Lightroom presets are a great way to improve my photos quickly. They help me keep my style consistent across all my work.
Exporting and Sharing Your Finished Images
Exporting images from Adobe Lightroom is the last step in my creative process. It turns edited photos into formats perfect for sharing. Choosing the right export settings is key. These settings affect the quality and how my images look on different platforms.
 Choosing the Right Export Settings
There are many things to consider when exporting images. Here are some important points:
- For social media, I resize images to 1080 pixels on the short edge for platforms like Instagram. This makes sure they look great without losing quality.
- For Facebook, I use a short edge of 2048 pixels to keep the image clear and appealing.
- I set the resolution for social media at 72 pixels per inch. This balances quality with file size.
- Adding a watermark during export protects my images and boosts my brand.
- For sharing on social media, I keep the quality at 100. This makes sure my images look their best everywhere.
- Applying output sharpening for “Screen” is crucial. I adjust it to low, medium, or high depending on the photo.
- With thousands of images, like the 7600 in this study, efficient exporting is vital.
I also use Smart Collections in my workflow. These collections help me sort images by “Pick Flag,” “Ratings (stars),” “Color Label,” and “Keyword.” Each label shows the image’s status, making it easier to manage my work.
| Status | Label Colour |
|---|---|
| To be worked | Red |
| A work in progress | Yellow |
| Needs further review | Green |
| Complete but not in a published collection | Blue |
| Complete and in a published collection | Purple |
Advanced Techniques for Professional Photographers
In my photography journey, learning advanced editing in Adobe Lightroom has changed my work. These tools help me improve my image processing skills. This makes my work better, whether for myself or for clients.
Lightroom offers many advanced techniques I can use. Here are seven key methods:
- Masking: This lets me edit specific parts of photos using brushes, gradients, or AI. It helps focus on what I want to highlight.
- Blurring backgrounds makes the subject stand out. It fixes mistakes and improves the photo’s look.
- Photo Stacking helps me manage similar images easily. This makes keeping my photos organised simpler.
- Making a collage in Lightroom is great for showing my work or making posters. I don’t need extra software.
- The slideshow feature is perfect for professional presentations. I can set it up with music, making it more engaging for my clients.
- Lightroom CC has Photo Merge for detailed editing. But for Photo Stacking, I switch to Lightroom Classic.
- For making books, Lightroom Classic is the best. It has tools for layout and can export directly to Blurb for printing.
Lightroom Classic, especially from version 11.3 or later, meets my advanced editing needs. The 14.3 update in Adobe Camera Raw gives me all the tools I need for great results.
Learning more with resources like the Attitude Creative School on Teachable is a smart move. It offers lifetime access to lessons with a 30-day refund guarantee. Using RAW images is best because they have more information. This helps me improve my image processing skills.

| Technique | Description | Tool Availability |
|---|---|---|
| Masking | Edit specific areas of photos using various brushes and gradients. | Lightroom CC & Classic |
| Background Blurring | Enhances focus on the main subject while correcting errors. | Lightroom CC & Classic |
| Photo Stacking | Groups similar images for easier management. | Lightroom Classic |
| Collage Creation | Design promotional material without external software. | Lightroom CC |
| Slideshow Feature | Allows custom presentations with settings and music. | Lightroom CC & Classic |
| Book Creation | Customisable layouts, direct export to Blurb. | Lightroom Classic |
| Photo Merge | Advanced feature for merging images. | Lightroom CC |
Tips for Black and White Editing
Starting with black and white editing opens up a world of creative possibilities. Adjusting the temperature and tint can greatly change the mood of an image. These settings help me create striking monochrome images.
Changing the white balance is key to getting the look I want. By adjusting the temperature between 2600 Kelvin and 7500 Kelvin, I see big changes in my images. Tools like the adjustment brush let me make local changes, improving certain parts of the photo.
The Hue/Saturation/Luminance panel in software like Adobe Lightroom is great for tweaking tones in black and white photos. I can change each hue separately, making my images more dynamic. Using the target icon in the Black and White Mix panel helps me enhance specific areas easily.
Using the Raw format is crucial for black and white editing. It lets me make detailed adjustments with my camera and software. When adjusting the Black & White Mix sliders, I keep changes under +35 or -35 to avoid pixelation.
Adding clarity carefully is important. I add a bit less than I think I need to keep the image natural. Trying out Lightroom presets is also useful. They’re a quick way to learn new editing techniques and see how others do it.
Adobe Lightroom Classic and the Adobe Monochrome Profile are essential for black and white editing. The Black and White Mix panel lets me make precise adjustments in different colour ranges. It’s important to experiment with each slider to get the best results based on the original colours.
| Adjustment | Recommended Range | Notes |
|---|---|---|
| Temperature | 2600 – 7500 Kelvin | Affects the overall warmth of the image |
| Black & White Mix Sliders | +35 to -35 | Avoid extreme adjustments to prevent artefacts |
| Clarity | Add slightly less than perceived | Helps maintain a natural look without overdoing |
| Local Adjustments | As needed | Utilise tools like adjustment brush for targeted edits |
Conclusion
Learning Adobe Lightroom is a journey that blends my technical skills with my artistic side. Since its start in 2007, Lightroom has grown a lot, giving me a big space for my photo editing tips. With each new version, like the advanced heal brush in Lightroom 5, I can turn simple photos into amazing art.
In this guide, I shared key techniques to improve my editing and workflow. Using Lightroom Classic’s features helps me manage and edit thousands of photos every year. These photos come from high-end devices in raw formats.
Looking ahead, I’m excited about new developments and a mini course on workflow. Some users prefer to stick with what they know, showing how varied our community is. But I’ll keep sharing tips that help most people grow in photography.


 Choosing the Right Export Settings